The Burr Method: Knowing When You’ve Reached the Edge
A burr is one of the clearest signs that sharpening has reached the apex.
A burr is a thin strip of steel that folds to the opposite side as the bevel reaches the apex. Learning to detect and remove it helps confirm that the entire edge has been sharpened.
What Is a Burr?
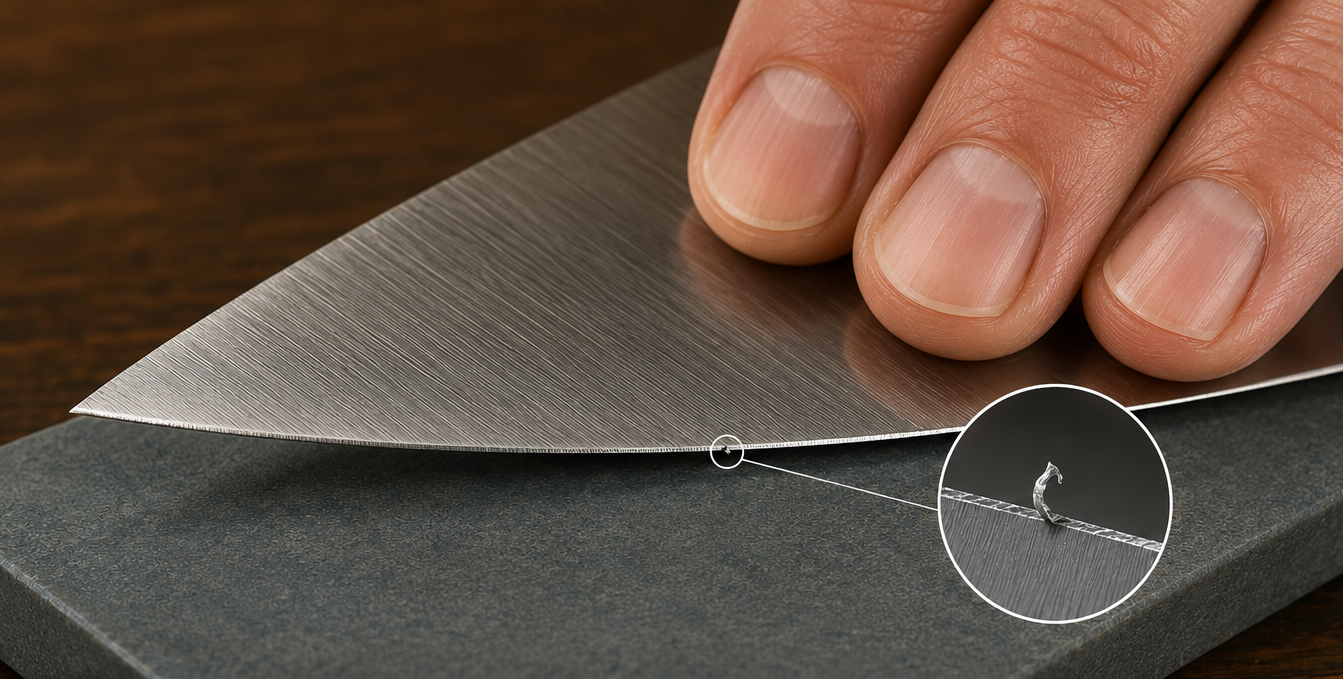
A burr is a thin strip of steel that folds over to the opposite side of the blade as sharpening reaches the apex.
It forms when the bevel has been worked all the way to the cutting edge. You can usually feel it by moving a fingertip carefully from the spine toward the edge—never along the edge.
The burr should be present from heel to tip before you switch sides.
Why You Need to Form a Burr
Forming a burr confirms that the bevel has reached the cutting edge. Without that confirmation, part of the blade may still be dull even if the bevel looks polished.
Check for the burr along the entire edge—from heel to tip. Once it is continuous, switch sides and repeat the process.
A small, controlled burr is enough. A large burr only means more steel has been removed and more weakened metal must be cleaned away.
How to Check and Remove the Burr
Check carefully along the full edge, moving from heel to tip. Feel from the spine toward the edge, never lengthwise along the blade.
Once a burr has formed on both sides, reduce pressure and use light alternating strokes to weaken and remove it. A few controlled stropping passes may help clear the last fine remnants.
The sharpening is finished when the apex feels clean and even, with no wire edge or loose burr remaining.
Key Takeaways
The burr is a checkpoint during sharpening, not the finished edge.
The Burr Confirms Apex Formation
A burr shows that sharpening has reached the cutting edge on that section of the blade.
Check Heel to Tip
The burr should be continuous along the full edge before you switch sides.
A Small Burr Is Enough
A large burr only removes more steel and leaves more weakened metal to clean away.
Remove It Before Finishing
Use lighter alternating strokes and, when helpful, a few controlled stropping passes to remove the burr.
References
The following sources were used in preparing and supporting this article.
How to Raise a Burr on a Knife
Work Sharp
worksharptools.com
I've Raised a Burr, What's Next?
Work Sharp
worksharptools.com
What Is Stropping?
Work Sharp
worksharptools.com