Tools of Our Trade
Professional sharpening combines controlled grinding, repair equipment, deburring tools, inspection lighting, macro photography, sharpness testing, and careful documentation.
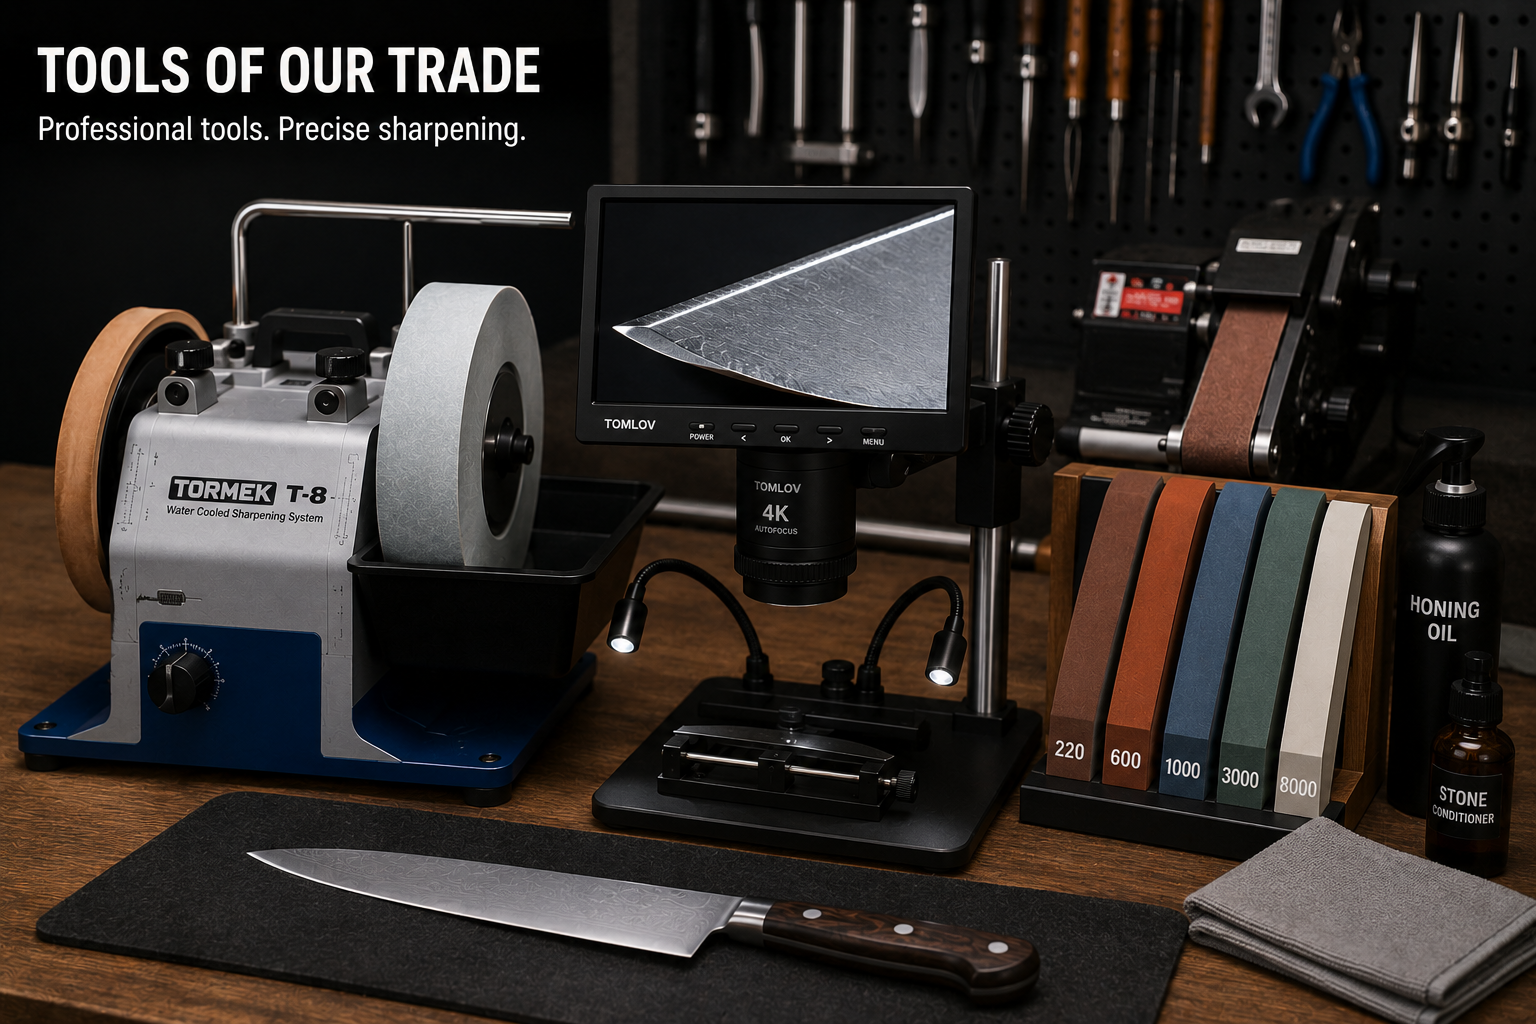
No single tool performs every part of professional sharpening equally well. The workshop uses water-cooled sharpening, belt equipment, leather and felt finishing surfaces, direct-light inspection, Canon macro photography, measuring tools, and Brubacher Edge Sharpness Scale testing.
The Guiding Principle
Use the least aggressive tool that can complete the work efficiently, accurately, and without removing unnecessary steel.
Why Several Tools Are Needed
Routine sharpening, deep chip repair, broken-tip reshaping, thinning, bolster reduction, burr removal, inspection, photography, and final testing are different jobs.
Some tools are best for controlled edge formation. Others are better suited to repair, shaping, polishing, documentation, or quality control. The process is selected according to the knife rather than forcing every blade through one identical sequence.
The Main Sharpening and Repair Systems
The systems overlap, but each has a different primary role.
Tormek T-8
Controlled SharpeningPros
Water cooling, slow wheel speed, repeatable jig support, controlled bevel formation, and integrated leather honing.
Cons
Major reshaping and broad thinning can take longer than on belt equipment.
Best For
Routine sharpening, bevel establishment, controlled edge restoration, and deburring.
Variable-Speed Belt Equipment
Repair and ReshapingPros
Efficient chip removal, tip repair, profile correction, thinning, bolster work, and scratch refinement.
Cons
Heat, overgrinding, scratches, and tip damage can occur quickly without careful control.
Best For
Repairs and geometry work that require faster or broader steel removal.
The Tormek T-8
The Tormek T-8 is a slow-speed, water-cooled sharpening system. Its abrasive wheel turns through a water trough, helping carry away swarf and control heat near the cutting edge.
A universal support bar, knife jigs, measured projection, support height, and wheel diameter help create a repeatable relationship between the blade and wheel.
The jig does not sharpen automatically. Accurate clamping, movement, pressure, tip control, inspection, and judgment are still required.
What Accurate Tormek Setup Requires
Projection Distance
The distance the blade extends from the jig affects the sharpening angle.
Support-Bar Height
The support position determines the blade’s relationship to the wheel.
Wheel Diameter
Wheel wear changes the geometry and must be considered during setup.
Blade Alignment
The knife must sit securely and predictably in the jig.
Tip Movement
The blade must follow its curve without rounding or overgrinding the point.
Pressure Control
Light, consistent pressure supports even steel removal and better control.
Variable-Speed Belt Equipment
Belt equipment moves abrasive continuously across a platen, contact wheel, or flexible section. It can remove steel efficiently for chip repair, broken-tip reshaping, bolster reduction, thinning, recurve correction, and major bevel resets.
Belts vary by abrasive mineral, grit, backing, flexibility, and intended use. A coarse repair belt is not a finishing abrasive.
Variable speed matters because belt speed affects cutting rate, heat, reaction time, and how quickly an error can develop.
Fresh Abrasives Improve Control
A worn belt or wheel stops cutting efficiently and begins creating more friction. Fresh, clean abrasives require less pressure, generate less unnecessary heat, and make steel removal easier to control.
Heat-Control Practices
The thin apex can overheat before the rest of the blade feels warm.
Water Cooling
The Tormek wheel operates in water to help manage heat during grinding.
Lower Belt Speed
The machine is run only as fast as needed for the current task.
Light Pressure
The abrasive should cut the steel without the blade being forced into it.
Short Contact
Brief passes reduce heat accumulation in one section of the edge.
Frequent Cooling
The blade can be cooled between suitable dry-grinding steps.
Frequent Inspection
Grinding stops as soon as the required steel has been removed.
Leather Wheels, Leather Belts, and Felt Finishing
Leather wheels and belts are used after the main bevels have been established. Their role is to reduce burr remnants, refine the apex, and provide the selected level of polish.
A felt wheel may be used for controlled polishing or finishing when appropriate. Leather and felt surfaces may be used bare or with a suitable compound or diamond emulsion.
Each surface should remain dedicated to one abrasive level to reduce contamination. Excessive pressure, too many passes, or raising the angle can round the apex and reduce sharpness.
Direct-Light Inspection
Strong overhead and directional lighting are among the most useful inspection tools in the workshop.
A dull, rolled, chipped, or incomplete section often reflects light where a clean apex would not. Moving the blade and light helps distinguish actual damage from glare on the bevel or blade finish.
Diffused light is useful for polished surfaces, while directional light helps reveal scratches, burrs, chips, and edge reflections.
Canon Macro Photography
A Canon camera with a macro lens is used when detailed visual documentation is helpful.
Macro photographs can record chips, rolls, corrosion, scratches, bevel condition, burr remnants, heel contact, and tip damage before and after service.
Useful images require stable positioning, controlled lighting, accurate focus, consistent orientation, and clear identification of the knife and photographed edge section. Close-up images support inspection and communication, but practical cutting performance still matters.
What BESS Means
BESS stands for Brubacher Edge Sharpness Scale. A BESS tester measures the force, expressed in grams, required for an edge to cut standardized test media. Lower Brubacher Edge Sharpness Scale readings indicate that less force was required at the tested point.
Sharpness and Practical Cutting Tests
Brubacher Edge Sharpness Scale testing provides a repeatable numerical reference before or after sharpening. It does not measure blade thickness, food release, durability, or the complete cutting geometry of the knife.
Paper testing can reveal snagging, rough sections, and edge inconsistency. Paper towel provides a more demanding check of apex refinement and burr removal.
Food tests may reveal whether an edge begins a cut cleanly and whether the blade wedges in dense produce. Testing methods are selected according to the knife and purpose.
Measuring, Marking, and Alignment Tools
A marker applied to the bevel can show where an abrasive is contacting during a light test pass.
Calipers, rulers, angle references, straightedges, and flat reference surfaces help document blade dimensions, check setup, evaluate thickness, identify bends, and confirm edge-profile contact.
These tools support repeatability and documentation, but measurements must still be interpreted in the context of the knife’s design.
Cleaning and Blade Protection
Sharpening produces swarf, abrasive residue, water, compound, marker ink, and fingerprints. These materials are removed before a knife is returned.
The blade and handle are dried fully, including the heel, bolster, ferrule, rivets, and handle joints.
Finished edges are protected with guards, secure sleeves, or separated packaging so they cannot contact other knives, puncture packaging, or injure the person handling the order.
Key Takeaways
Each Tool Has a Role
Controlled sharpening, repair, deburring, photography, measurement, and testing require different equipment.
Control Matters Most
Setup, speed, pressure, abrasive condition, cooling, and frequent inspection determine the result.
Quality Control Uses Several Checks
Direct light, macro photography, practical cutting tests, and Brubacher Edge Sharpness Scale measurements provide different information.
References
The following sources were used in preparing and supporting this article.
Tormek T-8 Original Water-Cooled Sharpening System
Tormek
tormek.com
The Tormek Way of Sharpening
Tormek
tormek.com
Knife Sharpening Options: A Quick Overview
Work Sharp
worksharptools.com
Macro Photography: How to Look Sharp!
Canon U.S.A.
usa.canon.com
PT50 Series Edge Sharpness Testers and the BESS
Edge On Up
edgeonup.com