Sharpening Stones for Home Use
Start with one dependable medium-grit stone, stable support, and a practical way to keep the surface flat.
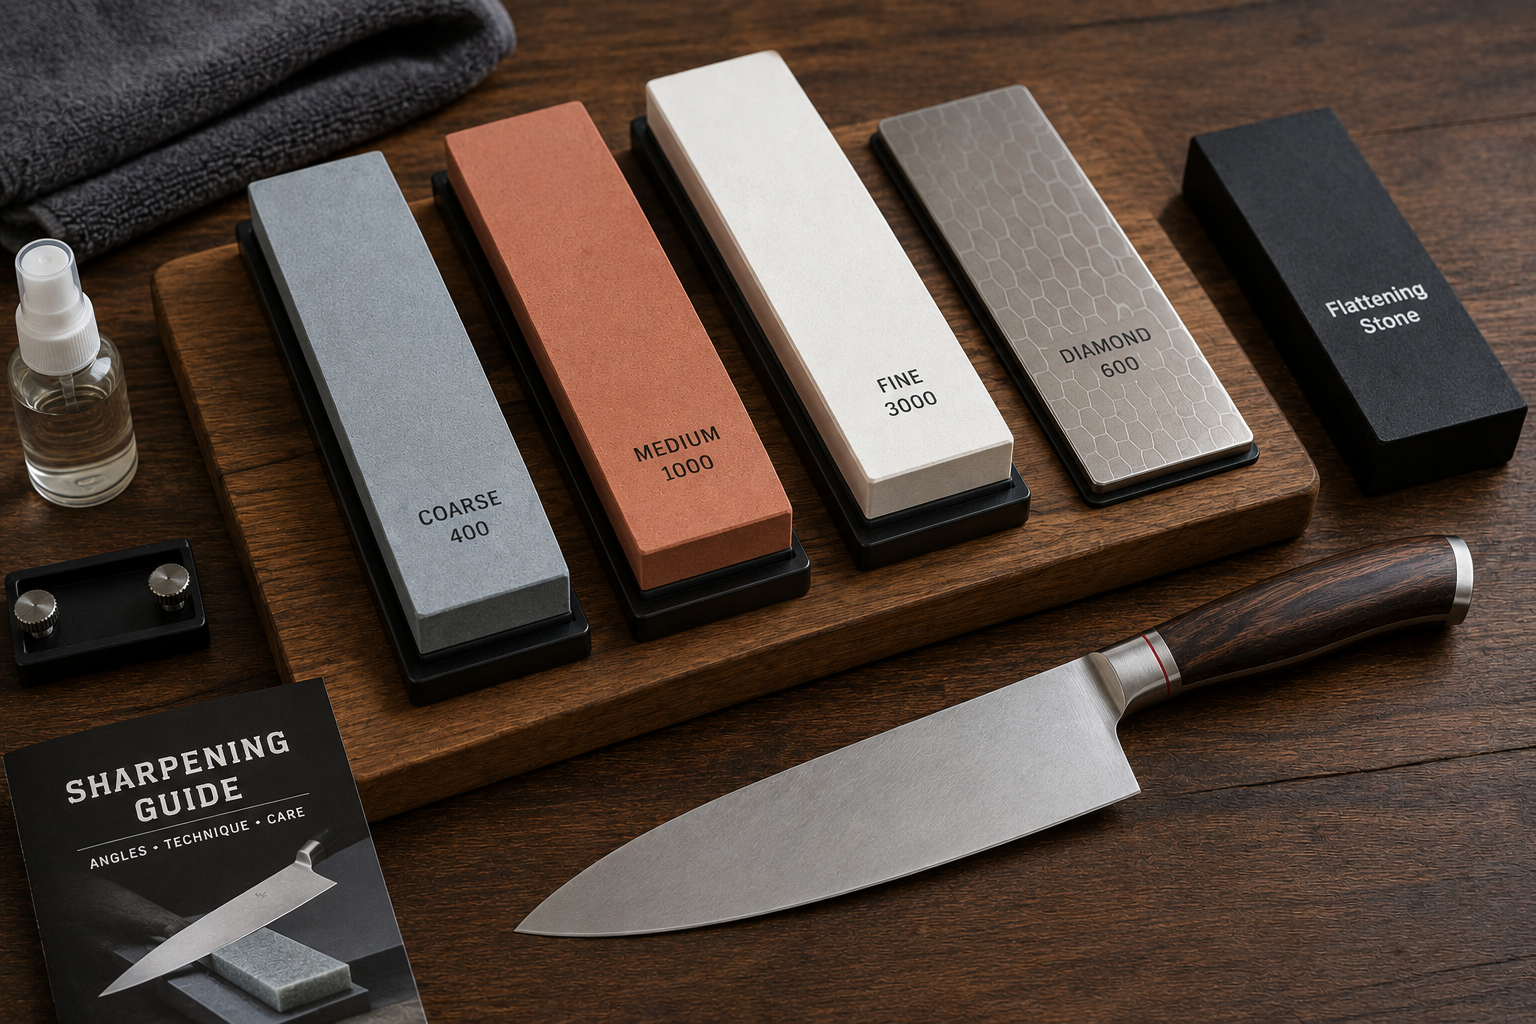
Most home cooks do not need a large progression of sharpening stones. One full-size medium-grit stone can maintain normally dull kitchen knives, while coarse and fine stones can be added later for repairs or refinement.
Start With the Edge, Not the Polish
A sharpening stone removes steel until both bevels meet at a clean apex. Coarser abrasives shape the edge quickly, while finer abrasives reduce scratches and refine the finish. A polished bevel can still be dull when the two sides never meet.
How Many Stones Do You Need?
Most beginners should buy less equipment and spend more time developing consistent technique.
One-Stone Setup
Best Starting PointPros
A medium stone can sharpen a normally dull kitchen knife from start to finish.
Cons
Slow for large chips, broken tips, severe dullness, and major angle changes.
Best For
Most home cooks learning routine sharpening.
Two-Stone Setup
More FlexibilityPros
A coarse stone handles repairs while a medium or fine stone refines the edge.
Cons
Adds expense, storage, flattening, and another progression step.
Best For
Users who regularly sharpen damaged or severely dull knives.
Large Progression
SpecializedPros
Allows detailed control over repair, scratch refinement, and polished finishes.
Cons
Costs more and provides diminishing practical returns for ordinary kitchen work.
Best For
Experienced enthusiasts with clearly defined finishing goals.
Choosing the Right Grit
| Grit Range | Primary Use | When It Makes Sense |
|---|---|---|
| Coarse — roughly 120 to 600 | Repairing chips, restoring severely dull edges, reprofiling, and minor tip work | Use when a medium stone would require excessive time and pressure. |
| Medium — roughly 800 to 1200 | Routine sharpening and creating a practical kitchen edge | The most useful first purchase for most home cooks. |
| Fine — roughly 2000 and above | Reducing scratches, refining the apex, and changing cutting feel | Add only after the edge has already been fully sharpened. |
Stone Materials and Lubrication
Water stones may be splash-and-go or designed for soaking. Preparation time and safe soaking limits vary, so follow the manufacturer rather than assuming every water stone behaves the same way.
Oil stones use honing oil, tend to wear slowly, and often remain relatively flat. They may cut more slowly on highly wear-resistant steels. Once a porous stone has absorbed oil, returning it to water use may not be practical.
Diamond plates cut quickly, remain flat, and work well on hard or wear-resistant steels. Their hard surface can feel aggressive, especially when new, and excessive pressure may shorten their useful life.
Dense ceramic stones can wear slowly and remain flat, but they may load with metal and need regular cleaning. Natural stones can produce distinctive finishes, but their behavior is less predictable and harder for beginners to evaluate.
For most beginners, a reputable synthetic stone provides the most predictable grit, performance, and value.
Size, Hardness, and Stability
A full-size bench stone is generally easier to learn on than a small pocket stone. More length and width provide room for smooth strokes, better blade support, and easier angle control. Thickness can extend service life, but larger stones also need more drying and storage space.
Soft stones release abrasive readily and may provide noticeable feedback, but they wear and dish faster. Hard stones often remain flatter longer and feel more direct. Neither feel is universally better.
The stone must not slide, rock, or twist. Use its fitted base, an adjustable rubber holder, a sink bridge, or a folded damp towel on a stable surface.
Flattening Is Part of the Purchase
Most water stones begin changing shape as soon as they are used. A dished surface makes consistent bevel contact harder and can transfer unevenness to the knife.
Flattening options include a compatible diamond lapping plate, silicon-carbide powder on a verified flat surface, or a purpose-built flattening stone. Wet-dry abrasive paper is sometimes used with suitable stones, but manufacturer guidance takes priority because some stone makers warn that paper can clog their products.
A pencil grid provides a simple check. Draw lines across the stone, lap the entire surface evenly, and continue until the marks disappear. Check frequently rather than waiting for a deep hollow to form.
Angle, Pressure, Burr, and Feedback
Clip-on angle guides can provide an approximate visual reference, but they do not account perfectly for blade width, taper, stone thickness, curved tips, or changing geometry. They may also scratch the blade or interfere near the heel.
A permanent marker is a useful diagnostic tool. Color the bevel lightly, make a few gentle strokes, and inspect where the marker remains. This shows whether the stone is contacting the shoulder, the apex, or the full bevel.
Use controlled pressure while establishing the bevel, then reduce pressure as the apex forms. When progress is too slow, move to a more suitable grit instead of pressing harder.
A small, consistent burr confirms that sharpening has reached the apex. The burr must then be reduced and removed with lighter, alternating strokes or another appropriate deburring method.
Practical Stone Progressions
| Knife Condition | Suggested Starting Point | Likely Finish |
|---|---|---|
| Normally dull | Medium stone | Finish on the same stone with progressively lighter pressure. |
| Severely dull or lightly damaged | Coarse stone | Move to medium after the damage is removed and the bevel is established. |
| Sharp but needing refinement | Medium or fine stone | Use only enough abrasion to restore the desired cutting feel. |
| Highly wear-resistant steel | Diamond plate or another suitable aggressive abrasive | Refine only as far as the intended task requires. |
High Grits and Premium Stones
A highly polished edge is not automatically better for kitchen use. Tomatoes, peppers, and fibrous foods may benefit from a slightly toothy medium-grit finish.
Premium stones may cut faster, wear more slowly, stay flatter, provide more consistent feedback, or produce a particular finish. Those benefits become meaningful after technique is consistent. Expensive equipment cannot correct unstable angles, excessive pressure, incomplete apexing, or poor deburring.
Upgrade only when you can identify a specific limitation in the stone you already own.
Cleaning, Drying, and Storage
Use clean water for water stones and the manufacturer’s recommended honing oil for oil stones. Do not substitute cooking oil. Refresh the surface when it dries or loads with swarf.
Cleaning methods depend on the abrasive. Water stones may be rinsed, brushed gently, or refreshed during flattening. Diamond plates should be rinsed and gently brushed. Dense ceramic stones may require a manufacturer-approved cleaning block or abrasive cleaner.
After use, rinse away loose swarf and allow the stone to dry gradually in a ventilated indoor area. Avoid ovens, radiators, direct sunlight, fans, freezing temperatures, and sealed storage while wet. Rapid drying and prolonged soaking can crack or soften some stones.
What a Beginner Should Buy
A complete starter setup can remain simple.
Medium Bench Stone
Choose a reputable stone around 800 to 1200 grit, or a practical combination stone.
Stable Support
Use the included base, an adjustable holder, sink bridge, or folded damp towel.
Flattening Method
Plan for compatible routine maintenance before the stone becomes badly dished.
Practice Knife and Marker
Learn angle, pressure, burr formation, and tip movement before working on valuable blades.
Common Beginner Mistakes
Buying Too Many Grits
A large progression adds cost and complexity before basic technique is established.
Starting Too Fine
A fine stone may polish a dull bevel without removing enough steel to restore the apex.
Ignoring Flattening
A dished surface makes stable bevel contact more difficult.
Using Excessive Pressure
Heavy pressure can dig into soft stones, deepen scratches, reduce control, and damage delicate edges.
Changing Angles Constantly
Unstable spine height creates rounded or uneven bevels.
Skipping Deburring
A retained burr may imitate sharpness briefly before folding or breaking away.
When Home Stones Are Not the Best Starting Point
Large chips, major tip loss, thickened geometry, deep corrosion, bends, cracks, loose handles, and unusual single-bevel, convex, hollow, or asymmetrical grinds may require specialized equipment and experience.
A custom, collectible, expensive, or sentimental knife should not be the first practice blade. Professional evaluation may prevent unnecessary steel removal or irreversible changes.
Key Takeaways
Start With One Useful Stone
A dependable medium-grit bench stone can maintain most normally dull kitchen knives.
Choose for the Knife’s Condition
Steel, damage, geometry, and the amount of metal removal required should guide grit and abrasive choice.
Plan for Skill and Maintenance
Stable support, flattening, pressure control, burr removal, cleaning, and practice matter as much as the stone.
References
The following sources were used in preparing and supporting this article.
Sharpening Stone FAQ
Shapton
shapton.co.jp
Knife Sharpening Basics
Korin
korin.com
How to Sharpen a Knife: Back to Basics
Work Sharp
worksharptools.com
DMT Diamond Sharpener FAQ
DMT Diamond Sharpeners
dmtsharp.com