A Day in the Life of a Knife Sharpener
Professional sharpening includes identification, inspection, repair decisions, controlled grinding, deburring, testing, cleaning, documentation, and safe return.
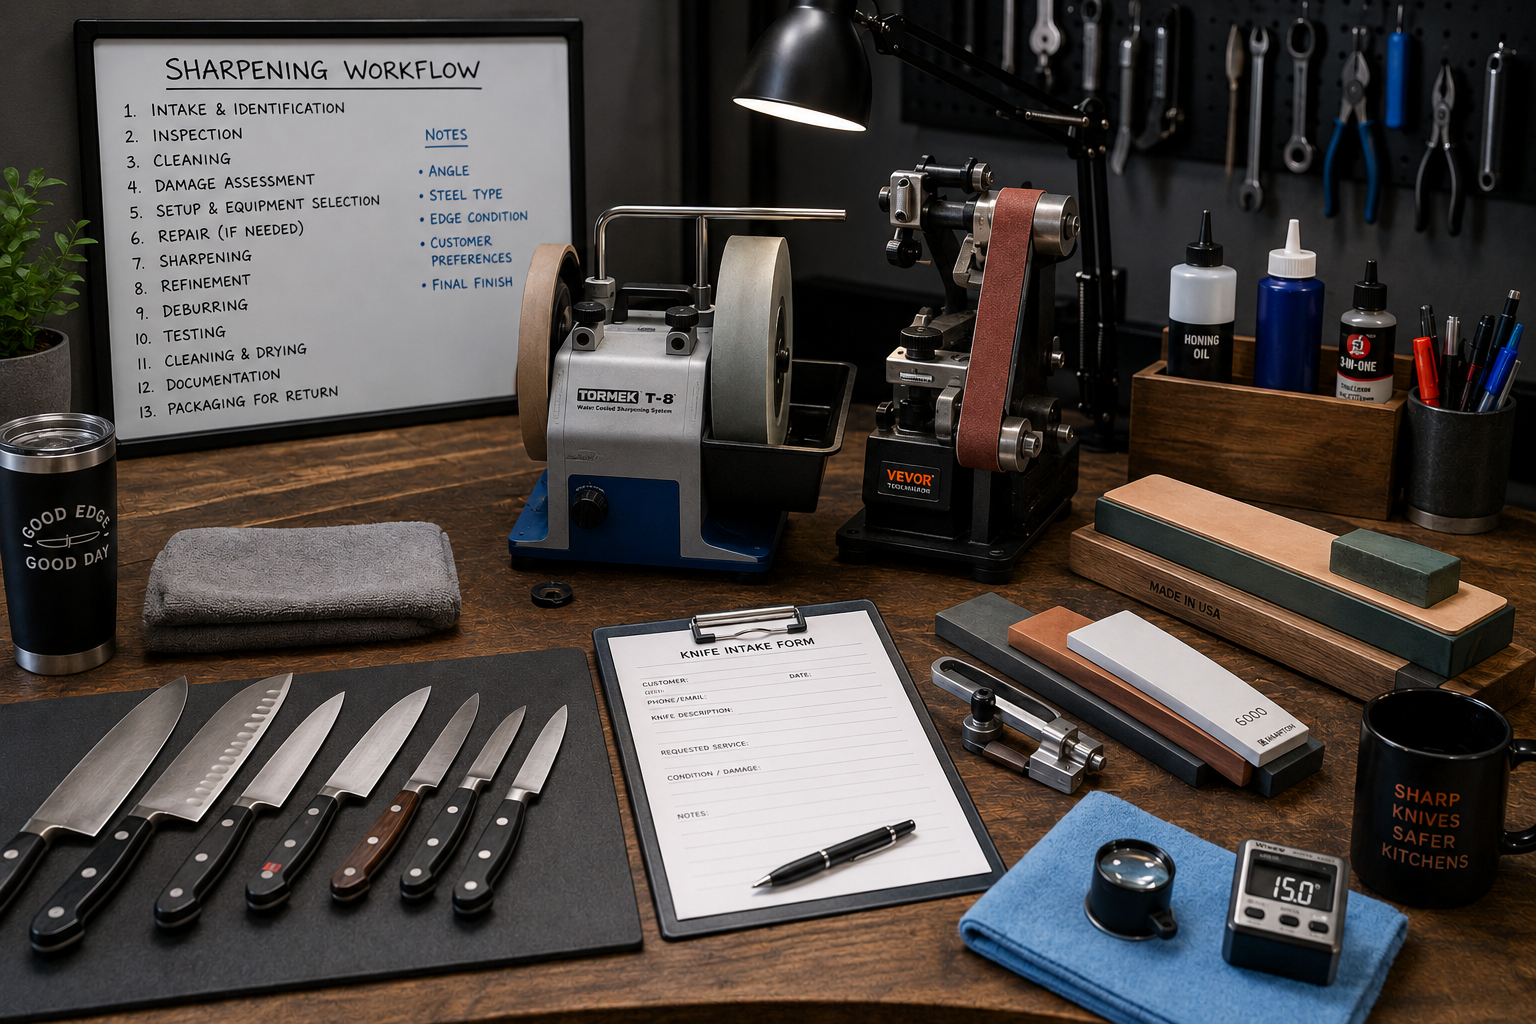
The visible sharpening step is only one part of professional service. Each knife must be tracked, inspected, matched to the right process, sharpened with controlled metal removal, tested, cleaned, documented, and protected for return.
The First Priority
Every knife must remain identified, protected, and matched to the correct customer from intake through pickup. Professional sharpening begins with control and documentation before an abrasive ever touches the blade.
Preparing the Work Area
The day begins by cleaning and organizing the bench, checking lighting, preparing water and cleanup supplies, and inspecting stones, wheels, belts, guides, holders, and safety equipment.
Bright overhead and directional lighting help reveal chips, edge reflections, uneven bevels, scratches, and burrs. Contact surfaces are kept free of loose abrasive, metal particles, oil, and debris that could scratch a customer’s knife.
Receiving and Inspecting Each Knife
Intake records may include the owner, knife type, brand, blade length, requested service, existing damage, special instructions, and intended use.
Inspection determines whether the knife needs routine sharpening, repair, thinning, cleaning, or customer approval before work continues. The edge, tip, spine, blade straightness, handle, corrosion, bevel width, asymmetry, thickness, and heel condition are examined under direct light and, when useful, magnification.
When the Customer May Need to Be Contacted
Some findings can change the price, profile, appearance, or safety of the knife.
Major Edge Damage
Large chips, a broken tip, deep corrosion, or a profile that requires substantial reshaping.
Structural Problems
A bent, twisted, cracked, loose, or otherwise unsafe knife may require repair or rejection.
Geometry Changes
Bolster reduction, thinning, or major repair can alter blade height, profile, finish, and cutting behavior.
Special or Collectible Knives
Handmade, historical, unusual, or sentimental knives may need additional approval before work begins.
Selecting the Sharpening Approach
No single machine, stone, or angle is ideal for every blade. The starting abrasive should be coarse enough to perform the required work efficiently without removing unnecessary steel.
Water-cooled systems can provide controlled grinding and repeatable angle support. Bench stones offer direct feedback and precise hand control. Belt systems can perform repair, reshaping, thinning, and efficient metal removal when used carefully. Guided systems, fine stones, ceramics, compounds, strops, and specialty abrasives may be used for compatible blades and finishing work.
The edge angle is chosen for the steel, geometry, intended use, durability needs, and owner preferences. The lowest possible angle is not automatically the best.
Establishing the Edge
The first bevel is worked until it reaches the apex consistently from heel to tip. A small continuous burr may confirm that the abrasive has reached the edge.
The second side is then sharpened to meet the first and transfer the burr. Equal bevel width is not always the goal because some knives are intentionally asymmetrical or have been altered by previous sharpening.
The sharpener monitors heel contact, the main cutting section, tip shape, bevel consistency, scratch patterns, pressure, and temperature throughout the process.
Heat Control Matters
Excessive heat near the thin cutting edge can affect steel properties and damage finishes or handles. Fresh abrasives, light pressure, controlled speed, cooling, short contact intervals, and frequent inspection help limit temperature rise.
Repair Work Changes the Process
| Condition | Typical Correction | Possible Result |
|---|---|---|
| Small chip | Lower the surrounding edge until the damaged area is removed. | The bevel may widen and thinning may be needed. |
| Broken tip | Reshape the spine, edge, or both to create a new functional point. | The repaired profile will differ slightly from the original. |
| Raised bolster | Reduce the bolster carefully so the heel can contact the board. | Full cutting contact can be restored. |
| Thick geometry | Remove material above the edge rather than only sharpening the apex. | The blade moves through dense food with less wedging. |
Refinement and Deburring
After the edge is established and repairs are complete, finer abrasives reduce the scratches from earlier stages and refine the apex. The finishing level depends on the knife, steel, intended use, and desired cutting feel. A highly polished edge is not automatically best for every kitchen task.
Deburring is critical. A remaining wire edge may feel sharp temporarily and then fail quickly. Lighter alternating strokes, finer abrasives, controlled edge-leading passes, and careful stropping may be used according to the steel.
A strop can remove light burr remnants and refine the apex, but excessive pressure or a raised angle can round the edge.
Inspection and Sharpness Testing
The finished edge is inspected under strong light and may be checked with magnification. The sharpener looks for reflected flat spots, remaining chips, burrs, inconsistent bevels, incomplete sharpening near the heel or tip, and damage to the blade finish.
Sharpness may be evaluated with more than one method. Paper, food, controlled cutting tests, and instrumented testing can reveal different aspects of the edge. Expectations should match the knife: a heavy cleaver, serrated bread knife, and thin slicing knife should not be judged by identical standards.
Cleaning, Documentation, and Safe Return
Metal particles, abrasive residue, water, compound, and marker ink are removed before return. The blade and handle are dried fully, including the bolster, ferrule, rivets, and joints. Food-safe protection may be applied to carbon steel when appropriate.
A final safety inspection notes loose handles, bends, deep corrosion, cracks, sharp projections, or other concerns unrelated to edge sharpness. Service records may include the work performed, repaired damage, edge angle, final condition, recommendations, and before-and-after photographs.
The sharpened knife is then protected with a guard, secure wrapping, or separated packaging. Customers should be reminded that the knife may be considerably sharper than they remember.
The Work Continues After the Knives Are Finished
Stones, wheels, belts, guides, holders, water trays, benches, and inspection tools must be cleaned and maintained. Worn belts, dished stones, contaminated strops, loose guides, and glazed wheels can affect later results.
Sharpening time varies. A lightly dull knife with sound geometry may be completed quickly, while damage, corrosion, a broken tip, thick geometry, poor prior sharpening, or a loose handle can extend the work. Even in a batch, each knife requires individual inspection and decisions.
Commercial orders may prioritize durable edges, turnaround planning, inventory control, and repeated patterns of heavy use or inconsistent maintenance.
Common Misconceptions
“It Only Takes a Few Passes”
Inspection, setup, apexing, deburring, testing, cleaning, and packaging are all part of the service.
“Every Knife Gets the Same Angle”
Angle should match the steel, geometry, intended use, and durability needs.
“More Polished Is Always Better”
Many kitchen tasks benefit from a practical edge with some bite rather than the highest polish.
“Missing Steel Can Be Restored”
Chips and broken tips are repaired by reshaping the remaining blade.
“Sharpness Is the Only Goal”
Durability, geometry, safety, cleanliness, and real cutting performance also matter.
“Powered Equipment Ruins Knives”
Damage comes from poor technique, excess heat, pressure, unsuitable abrasives, or uncontrolled use—not simply from power.
What Customers Can Do
Good preparation and care help protect the knife before and after service.
Before Drop-Off
Clean the knives, protect the edges, describe damage, explain intended use, and share special requests.
Transport Safely
Use guards, cardboard sleeves, or secure wrapping so blades cannot shift or puncture packaging.
After Pickup
Use a wood or quality plastic board, wash by hand, dry immediately, and store the edge protected.
Key Takeaways
Preparation Comes First
Tracking, inspection, cleaning, damage evaluation, and process selection happen before sharpening.
Every Knife Is Individual
Steel, geometry, damage, intended use, and owner preferences affect the angle, abrasive progression, and finish.
Quality Control Finishes the Job
A knife is complete only after deburring, inspection, testing, cleaning, documentation, and safe packaging.
References
The following sources were used in preparing and supporting this article.
Knife Sharpening: How to Sharpen Your Knives
Tormek
tormek.com
Knife Sharpening Basics
Korin
korin.com
How to Sharpen a Knife: Back to Basics
Work Sharp
worksharptools.com
PT50 Series Edge Sharpness Testers
Edge On Up
edgeonup.com