Garden Tools and Pruners
Sharp, clean garden tools make healthier cuts, require less effort, and are easier to control.
Pruning shears, loppers, hedge shears, garden knives, and other cutting tools gradually become dull, dirty, rusty, or misaligned. Proper cleaning, inspection, lubrication, adjustment, and sharpening help them perform safely and extend their useful life.
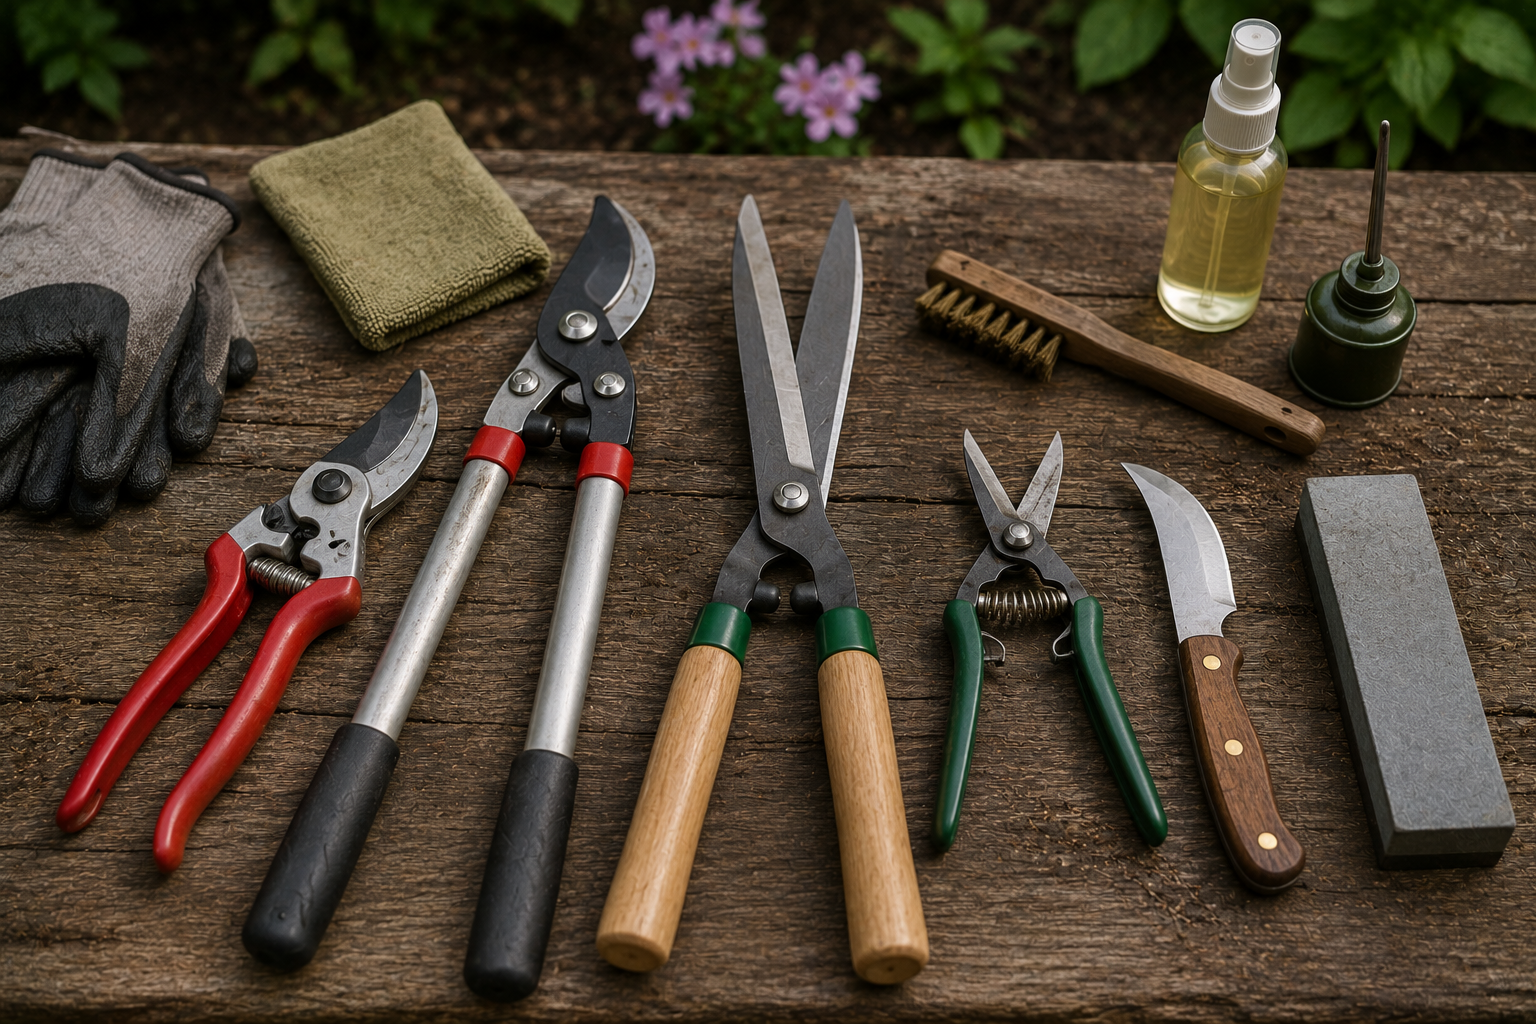
The practical approach: keep tools clean, sharpen them before severe dullness develops, and correct pivot or alignment problems instead of compensating with more force.
Sharp garden tools make better cuts
A sharp pruning tool cuts plant material cleanly instead of crushing, tearing, or splitting it. Cleaner cuts are easier to make and leave less ragged tissue behind.
Dull tools require more hand pressure and may twist or slip before completing the cut. That can make pruning tiring and less controlled, especially when working overhead, on ladders, or around dense branches.
Common garden cutting tools
Bypass and anvil pruners work differently
Bypass pruners use two blades that pass one another like scissors. One blade is usually sharpened, while the opposing blade supports the stem and helps guide the cut.
Anvil pruners use a sharpened upper blade that closes against a flat lower surface. They can work well on dry or dead material but may crush softer live stems more than a properly adjusted bypass tool.
Bypass Pruners
Best suited to clean cuts on live stems when the blade, hook, and pivot remain properly aligned.
Anvil Pruners
Useful for dry or woody material, but the blade and anvil must meet evenly.
Do Not Sharpen Both Sides
Many pruner blades use a single primary bevel and should not be treated like double-bevel knives.
Signs a tool needs attention
• Stems crush, tear, or fold instead of cutting cleanly.
• The handles require noticeably more pressure than before.
• The blades snag or stop at one specific point.
• The tool cuts near the pivot but not near the tip.
• The blades separate instead of passing closely together.
• Visible chips, dents, rust, or flat spots appear along the edge.
• The pivot feels loose, gritty, or excessively tight.
• The spring no longer opens the handles normally.
• The lock does not hold the tool securely closed.
Not every problem is caused by dullness
A tool may cut poorly even when the edge still feels sharp. Sap, grit, corrosion, loose hardware, bent blades, pivot wear, damaged springs, and poor alignment can all interfere with performance.
Never sharpen over heavy sap, rust, or soil. Contamination can clog abrasives, hide edge damage, and make controlled work more difficult.
Clean tools before sharpening
Dirt, sap, plant residue, rust, and dried debris can hide damage and interfere with sharpening. Cleaning also makes it easier to evaluate how the blades meet.
• Remove loose soil and plant material with a brush or cloth.
• Clean sap and sticky residue with a product suitable for the tool materials.
• Wash the blades when appropriate without soaking wooden handles or enclosed mechanisms.
• Dry the tool completely.
• Inspect the edge, pivot, spring, lock, handles, and fasteners.
• Lubricate the pivot lightly after cleaning when appropriate.
Disinfecting between plants
Garden tools can carry plant material, sap, fungi, bacteria, and other contaminants from one plant to another. Cleaning and disinfecting may be important when working around diseased plants or moving between sensitive specimens.
Follow current horticultural guidance and the disinfectant manufacturer’s instructions. Some products can damage finishes, remove lubrication, or encourage corrosion if left on the tool.
Remove Debris First
Disinfectants work more effectively when soil, sap, and plant tissue have already been removed.
Use the Correct Contact Time
Wiping a product off immediately may not provide the intended disinfecting effect.
Dry the Tool
Moisture left around pivots and blades can contribute to corrosion.
Relubricate When Needed
Some cleaning products remove protective oils from the pivot and blade.
Garden pruners and shears should not automatically be sharpened like kitchen knives. Their blade contact and single-bevel geometry must be preserved.
Preserve the original bevel
Most pruning blades have a specific bevel angle designed for their cutting action. Changing that angle can weaken the edge, make the tool cut poorly, or prevent the blades from meeting correctly.
The goal is usually to follow the existing bevel, remove only enough material to restore a clean edge, and avoid grinding the flat mating surface unnecessarily.
Sharpening bypass pruners
Bypass pruners usually have one sharpened cutting blade and one thicker supporting hook. Most sharpening is performed on the outside bevel of the cutting blade.
• Clean and inspect the tool.
• Open or disassemble it only when the design allows and reassembly is understood.
• Identify the existing bevel.
• Use a fine file, stone, or suitable abrasive that follows the blade curve.
• Work from the pivot area toward the tip in controlled strokes.
• Remove only enough steel to restore a continuous edge.
• Remove the burr carefully from the flat side without creating a second bevel.
• Reassemble, adjust, lubricate, and test the tool.
Sharpening anvil pruners
Anvil pruners typically use one sharpened blade that closes against a flat or slightly shaped anvil. The cutting bevel should be maintained without changing how the blade meets the anvil.
The anvil should also be inspected for grooves, cracks, deep cuts, looseness, or uneven wear. A sharp blade may still cut poorly when the lower surface is badly damaged.
Maintain the Blade Bevel
Follow the original angle rather than making the edge thinner than the tool can support.
Inspect the Anvil
Deep grooves or deformation can prevent consistent contact.
Check Blade Position
The edge should meet the anvil evenly rather than striking one side first.
Hedge shears require even blade contact
Hedge shears use long blades that pass one another across a wide cutting area. A small bend, loose pivot, nick, or uneven sharpening can create sections that cut well and others that leave stems uncut.
The blades should be inspected for straightness and progressive contact before sharpening begins. Removing steel unevenly can make existing alignment problems worse.
Loppers need more than a sharp blade
Long handles create substantial leverage. That helps cut larger branches, but it also increases the stress placed on blades, pivots, bumpers, handles, and fasteners.
Before sharpening loppers, inspect the entire tool for structural damage.
• Check handles for cracks, bends, looseness, and damaged grips.
• Inspect the pivot bolt and locking hardware.
• Look for chips, dents, and blade deformation.
• Check bumpers and stops for wear or breakage.
• Confirm that the blades meet correctly throughout the cut.
• Replace unsafe components before returning the tool to service.
When the cut requires extreme force, stop and use a larger lopper, pruning saw, or other tool intended for the branch.
Do not exceed the tool’s cutting capacity
Pruners and loppers are usually rated for a maximum branch diameter. Attempting to force larger material through the tool can bend blades, loosen pivots, crack handles, and damage the edge.
Branch hardness also matters. A dry hardwood branch may place far more stress on the tool than a fresh green stem of similar diameter.
Avoid twisting during the cut
Twisting the handles while the blade is embedded places sideways force on the edge, pivot, and supporting blade. This can create chips, bends, looseness, and poor alignment.
Position the tool squarely around the branch and complete the cut with controlled pressure. If the blade becomes trapped, reopen it carefully instead of forcing it sideways.
Pivot adjustment affects cutting performance
A loose pivot allows the blades to separate and lets plant material fold between them. An overly tight pivot makes the tool difficult to operate and can create excessive wear.
Adjustable tools should open smoothly while maintaining enough blade contact to cut cleanly. Riveted pivots or damaged hardware may require specialized repair or replacement.
Too Loose
Blades separate, cuts fold, and the handles may wobble.
Too Tight
The tool becomes tiring to use and may not open freely.
Properly Adjusted
The blades move smoothly while maintaining controlled contact.
Springs, locks, and replacement parts
Hand pruners often include replaceable springs, locks, pivot bolts, blades, bumpers, and handle components. A tool may be worth repairing when parts remain available.
Rust removal and prevention
Garden tools regularly encounter water, soil, fertilizer, plant acids, sap, and humid storage. Stainless components can still corrode, while carbon-steel blades often require more frequent care.
Remove Surface Rust Early
Light corrosion is easier to address before it becomes deep pitting.
Dry After Cleaning
Pay attention to pivots, springs, handle joints, and overlapping blades.
Apply Light Protection
Use a suitable oil or corrosion protectant on vulnerable metal surfaces.
Store in a Dry Location
Avoid damp sheds, wet soil, open buckets, and moisture-trapping covers.
Lubrication should be light and controlled
A small amount of suitable lubricant can improve pivot movement and help protect metal. Excess oil attracts grit, soil, and plant debris.
Apply lubricant sparingly, operate the tool several times, and wipe away the excess. Keep products away from surfaces where they may interfere with plant work or contaminate harvested food.
Do not return a sharpened blade to service when the handles, pivot, spring, lock, or frame remain unsafe.
When a tool may not be worth repairing
Quality garden tools may justify blade replacement, pivot service, and professional sharpening. Severely damaged inexpensive tools may be safer and more economical to replace.
• The blade or handle has a structural crack.
• The pivot is badly worn and cannot maintain alignment.
• The blade is deeply bent or twisted.
• Corrosion has severely weakened the cutting area or hardware.
• Replacement parts are unavailable.
• The handles flex, separate, or feel unsafe under pressure.
• Previous grinding has significantly altered the blade geometry.
• The repair cost approaches or exceeds the cost of a suitable replacement.
Safe handling during sharpening
Garden tools may have springs that force the handles open, long blades, pointed tips, and awkward shapes. Secure the tool before sharpening and keep hands away from the cutting path.
Secure the Tool
Use a stable work surface, clamp, or other support that does not damage the handles or frame.
Control the Spring
Prevent spring-loaded handles from opening unexpectedly during work.
Work Away From the Edge
Position fingers behind the abrasive and outside the blade’s path.
Wear Appropriate Protection
Eye protection and work gloves may be appropriate depending on the repair method.
Test the tool after service
A sharpened tool should be tested with plant material or a suitable substitute that reflects its intended use.
• Confirm that the blades open and close smoothly.
• Check that the pivot remains secure.
• Make sure the lock works correctly.
• Test cutting near the pivot, middle, and tip.
• Look for folding, tearing, snagging, or incomplete cuts.
• Listen and feel for rough contact between the blades.
• Confirm that the handles remain secure under normal pressure.
Daily care during gardening season
• Brush or wipe away loose soil and plant residue after use.
• Remove sap before it hardens.
• Dry the tool when it has been exposed to water or damp vegetation.
• Inspect the blade and pivot for damage.
• Apply a small amount of lubricant when movement becomes dry or rough.
• Store the tool closed or guarded in a dry location.
• Sharpen when cutting quality begins to decline.
Seasonal storage
Before storing garden tools for an extended period, clean them thoroughly and correct problems that could worsen during storage.
Garden-tool safety
Sharp pruners and shears require less force, but they can also cut quickly. Keep fingers outside the jaws, maintain secure footing, and stay aware of the blade path.
• Engage the lock before carrying or storing hand pruners.
• Do not place fingers between blades to remove trapped material.
• Use both hands as intended on loppers and hedge shears.
• Avoid cutting overhead when branches may fall unpredictably.
• Keep bystanders away from long handles and cutting paths.
• Do not use damaged tools until they have been repaired or replaced.
• Wear appropriate eye, hand, and body protection for the work.
A practical maintenance kit
Cleaning Brush
Removes loose soil, bark, plant tissue, and debris.
Sap Remover
Helps clean sticky residue without aggressive scraping.
Fine File or Stone
Restores suitable bevels when used with controlled technique.
Light Lubricant
Protects pivots and improves movement when applied sparingly.
Rust-Removal Material
Addresses light corrosion before deep pitting develops.
Clean Cloths
Useful for drying, wiping excess oil, and inspecting metal surfaces.
Key Takeaways
Clean Before Sharpening
Remove sap, soil, rust, and plant debris so the edge and mechanism can be inspected properly.
Preserve the Geometry
Follow the original bevel and maintain proper blade contact rather than sharpening garden tools like ordinary knives.
Maintain the Whole Tool
Pivots, springs, locks, handles, alignment, lubrication, and storage matter as much as edge sharpness.
References
The following sources were used in preparing and supporting this article.
How to Sharpen and Maintain Your Pruning Tools
FELCO North America
america.felco.com
Clean and Disinfect Gardening Tools and Containers
University of Minnesota Extension
extension.umn.edu
Caring for Winter Pruning Tools
University of Minnesota Extension
extension.umn.edu
Landscape and Horticultural Services: Hazards and Solutions
Occupational Safety and Health Administration
osha.gov